It can be so hard to photograph products. We feel your pain! How to improve your home product photography? How do you showcase small jewellery or dainty features? How do you photograph glass? What lighting is best to use?
If you spend so much time making your product, then it’s worth putting the time in to take great product photos so that they sell well.
Holly Booth Studio
Pedddle founder Nicki recently spoke to lifestyle photographer & stylist Holly Booth, to find out the answers to these queries and more…

Holly’s Top Tips for your DIY instagram images
5 ways to improve your home product photography with Holly Booth Studio
- Showcase Your Personality
Be authentic to you – how do you want to put across your personality/business? What things are you passionate about, aside from your products?
Take pictures that reflect you and your brand and see that they all fit into a theme (see Holly’s inspo accounts below).
2. Get the right lighting
Use bright, light images, not dark and dingy ones! One of the best ways to improve your home product photography is to make sure you take your photos in daylight (go near to a window ideally for natural light). It’s not always a case of ‘the brighter the better’, as bright lights can be harsh. If your natural light is very bright, use voile, light fabric or even tracing paper next to a window to diffuse the light. Light changes throughout the day and seasons, so experiment around your home or studio to see which times of day the light works best for you.
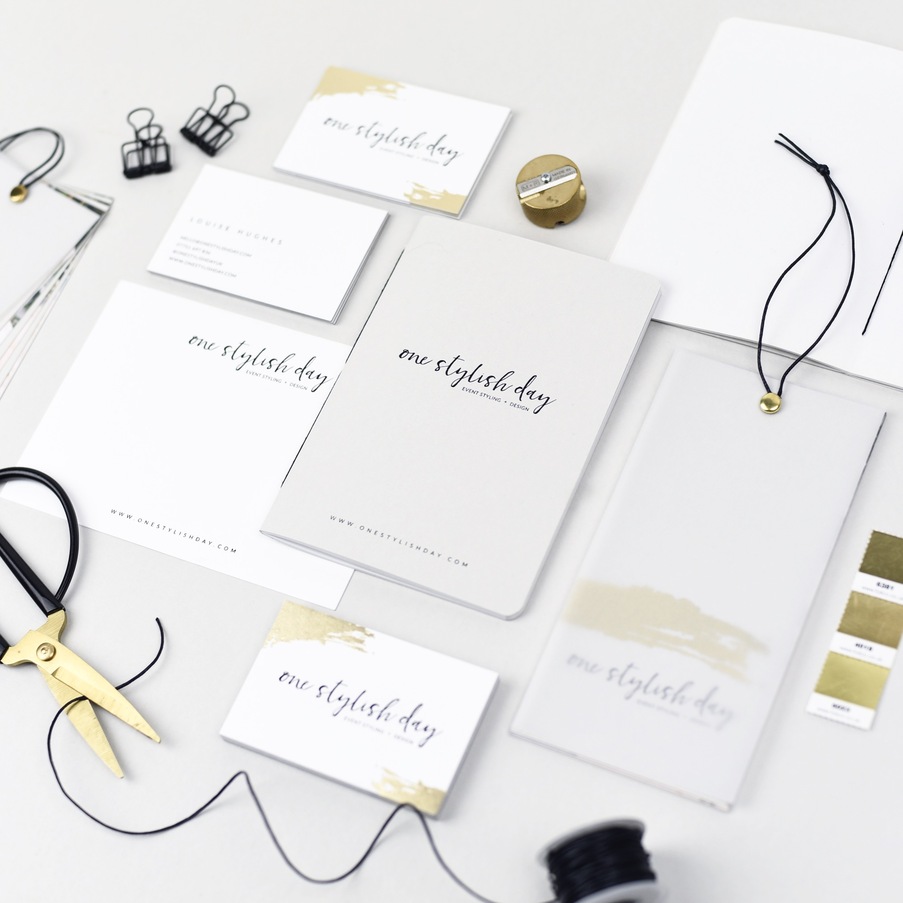
3. Use props
Have you considered putting together a prop box? You can easily improve your home product photography with some handy background pieces. It’s great to have lots of props to hand but remember to keep it minimal in shots – you don’t want to confuse your customer as to what you’re actually selling! If you’re not confident with styling then always keep it simple, don’t distract from the product.
Keep props relevant to your product or brand. For example, if you’re an artist you might want to include paintbrushes, or if you produce embroidery then including thread or scissors in a photo is a nice touch to reference the making process.
Props can paint a story to your customers about your products, brand, process and personality, and are also useful in giving the scale of a product too.
4. Brand consistency is key
Brand consistency allows you to become recognisable to people.
Think about your brand and who your target audience is. Create a Pinterest board of ideal customers and the look of your brand with key colours and words, e.g. ‘bright and modern’, ‘rustic’ etc. Decide the look you want and make sure any props and colours you use always fit in with that theme.
Always use the same coloured background, colour palette or same coloured props. Keep a prop box with a certain colour palette or style and make a note of the time of day you’re shooting pics, so you can get the same lighting and consistency all the time. Take lots of images at same time so they all match. Pre-planning is key – make sure you have a back-catalogue of pics ready to share!
Holly herself uses pinks, pale mints and more recently ochre for a strong brand identity and consistency: www.instagram.com/hollyboothstudio
5. Most common mistakes
Bad lighting – Don’t rush photos last-minute just because you need to put something on your social media. A badly-lit image instantly looks poor quality, and your products desevre to be shown at their best!
Taking close-ups – Give your products some ‘breathing room’. Shoot wide, then crop it in if you need to. Don’t make it the product feel pressed against the lens – it can feel overpowering. Open up the shot, make it more inviting and stylised to that it feels thoughtful and produced with care.
Using pictures of random things – as cute as your cat, dog, your tea or baby may be, is it relevant to your business brand? Or do the colours or the comment fit in? If you produce dog portraits then photos of your dog are great, but if you produce embroidery then maybe keep the pet pics for your personal social media. Make sure you always remain on theme!
INSPO:
Jo Want from Hello Sunshine uses yellow tones and takes behind-the-scenes shots, but her strict colour palette keeps it all on theme.
Lauren of Lauren Aston Designs shows a great mix of her sense of humour & product. Including home shots has become part of her brand and what she is known for.
Annie Dornan Smith shows what she’s working on, gives ‘behind the scenes’ shots of her hobbies and showcases her personality and personal pursuits to engage people, and add authenticity to her brand.


A side note on Instagram accounts:
Nicki says: These accounts are pretty inspiring and shouldn’t feel overwhelming to create. Don’t look at the number of ‘likes’, create a grid that you are pleased with, that belongs to you and feels authentic to your business. You want to get to a place where you feel confident that if someone looks at your account, they will like it, and if they are considering you for a market selection, you know you have a strong chance. Be mindful of how many other people’s graphics you use too.
Sometimes a market organiser’s graphic does not fit with your brand and therefore you should consider creating your own. There are a couple of great examples below of stallholders hitting a neat look for their social media, whilst keeping to their brand identity and sharing the markets they will be exhibiting at. Ruby Tynan Jewellery and TheThomas-Coles are two great examples:


Holly’s services:
Product photography & styling
Holly run a postal service – you can post stuff to her studio & she’ll take lifestyle photos of the product then post it back, so you don’t have to take out time. This is a super quick, easy and effective way of getting professional shots for your products, and works wherever you are based. Holly has clients from all over the EU & US.
Subscription box photos
Holly offers ‘behind the scenes’ brand shoots, which lets your customers look behind your products, discover the process behind your business and the making process. You can also get great headshots which gives your customers an idea of who you are. Holly really offers a ‘one stop shop’ for small businesses, and this service gives you a catalogue of shots you can go back to, to use in future and tell your story.
Workshops
Holly offers workshops too, so that you can learn photography as a craft. Keep an eye on her Insta page to see what’s coming up: www.instagram.com/hollyboothstudio
On site/behind the scenes shoots
Holly travels wherever she needs to for brand shoots, it just depends on timing – get in touch with her to discuss your requirements!
How to prepare for a product photoshoot: https://www.hollybooth.com/how-to-prepare-product-photoshoot.
Where to find Holly:
www.instagram.com/hollyboothstudio
OTHER QUESTIONS:
If you charge for a full day of photography, do you pass the charges onto your client if you go over that time?
Nicki says- I misunderstood this question when we were live – sorry!
Holly’s answer – If I feel the number of products and the work will be more than first thought, I will contact the customer directly and raise the issue beforehand. If, for whatever reason, it goes over my allocated time, I will soak it up in my hours.
How do I take great photos of my products?
Try flat lay photos – create layers with props, e.g. add postcards, pencils or similar to add interest and space the products out, then photograph them from above. Photoboards are really useful, which you can check out here: https://www.photoboards.org
Capture By Lucy provides great vinyl backdrops too: https://www.capturebylucy.com/backdrops
Check out Holly’s blog on how to style your product photos for some great tips: https://www.hollybooth.com/how-to-style-product-photos
What camera lens is best?
The go-to camera lens for many is a 50mm. It’s affordable and versatile – great for standard shots, portraits, flat lays and so on.
What phone settings are best for photos?
VSCO is a great app to edit your photos, look out for it in the app store.
Instagram has a host of great filters, and its in-app editing software is great to easily add or remove warmth, brightening, contrasts and so on.
What is the best way to learn photography?
YouTube is great! Google your camera type & see if there are step-by-step videos to learn the settings etc.
Many photographers offer different courses – see what’s on in your area.
Holly herself sometimes offers courses. See her full list of services at www.hollybooth.com.
I struggle to get the natural colours of my handmade scarves to come out on my camera phone – how do I ensure they’re accurate?
This largely depends on the time of day you take the photos. All sorts of things can effect colour, especially when taking photos with your phone, from the room lighting to even the clothing you wear, which can cast a shadow and alter the colour. Always keep background colours minimal and try and take photos in a neutrally-coloured room – you could use a foam board or similar to create a white light backdrop to take other colours out and reduce contrast.
The VSCO app is good for altering blue tones and brightness.